
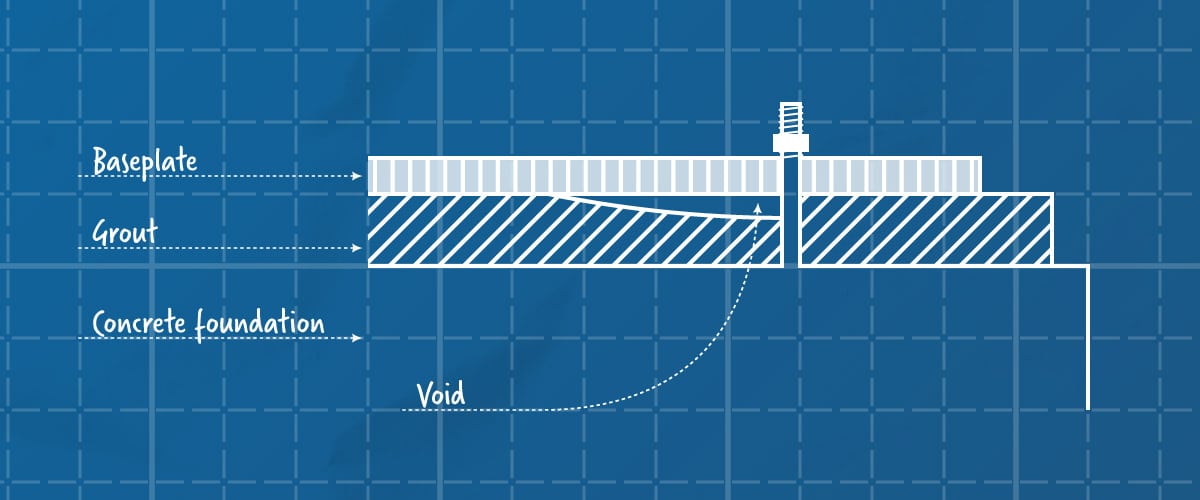
Baseplate void filling is an essential process for maintaining the structural integrity of machinery and ensuring proper load transfer from equipment to its foundation. These voids often result from improper grout placement, air entrapment, or uneven surfaces, which can compromise the performance and safety of the structure.
Whether you’re tackling this challenge for the first time or looking to refine your process, this guide provides a detailed, practical, and effective approach to filling baseplate voids. Let’s dive into the six essential steps to ensure a flawless result.
Whether you’re tackling this challenge for the first time or looking to refine your process, this guide provides a detailed, practical, and effective approach to filling baseplate voids. Let’s dive into the six essential steps to ensure a flawless result.
Step 1: Identify the Void
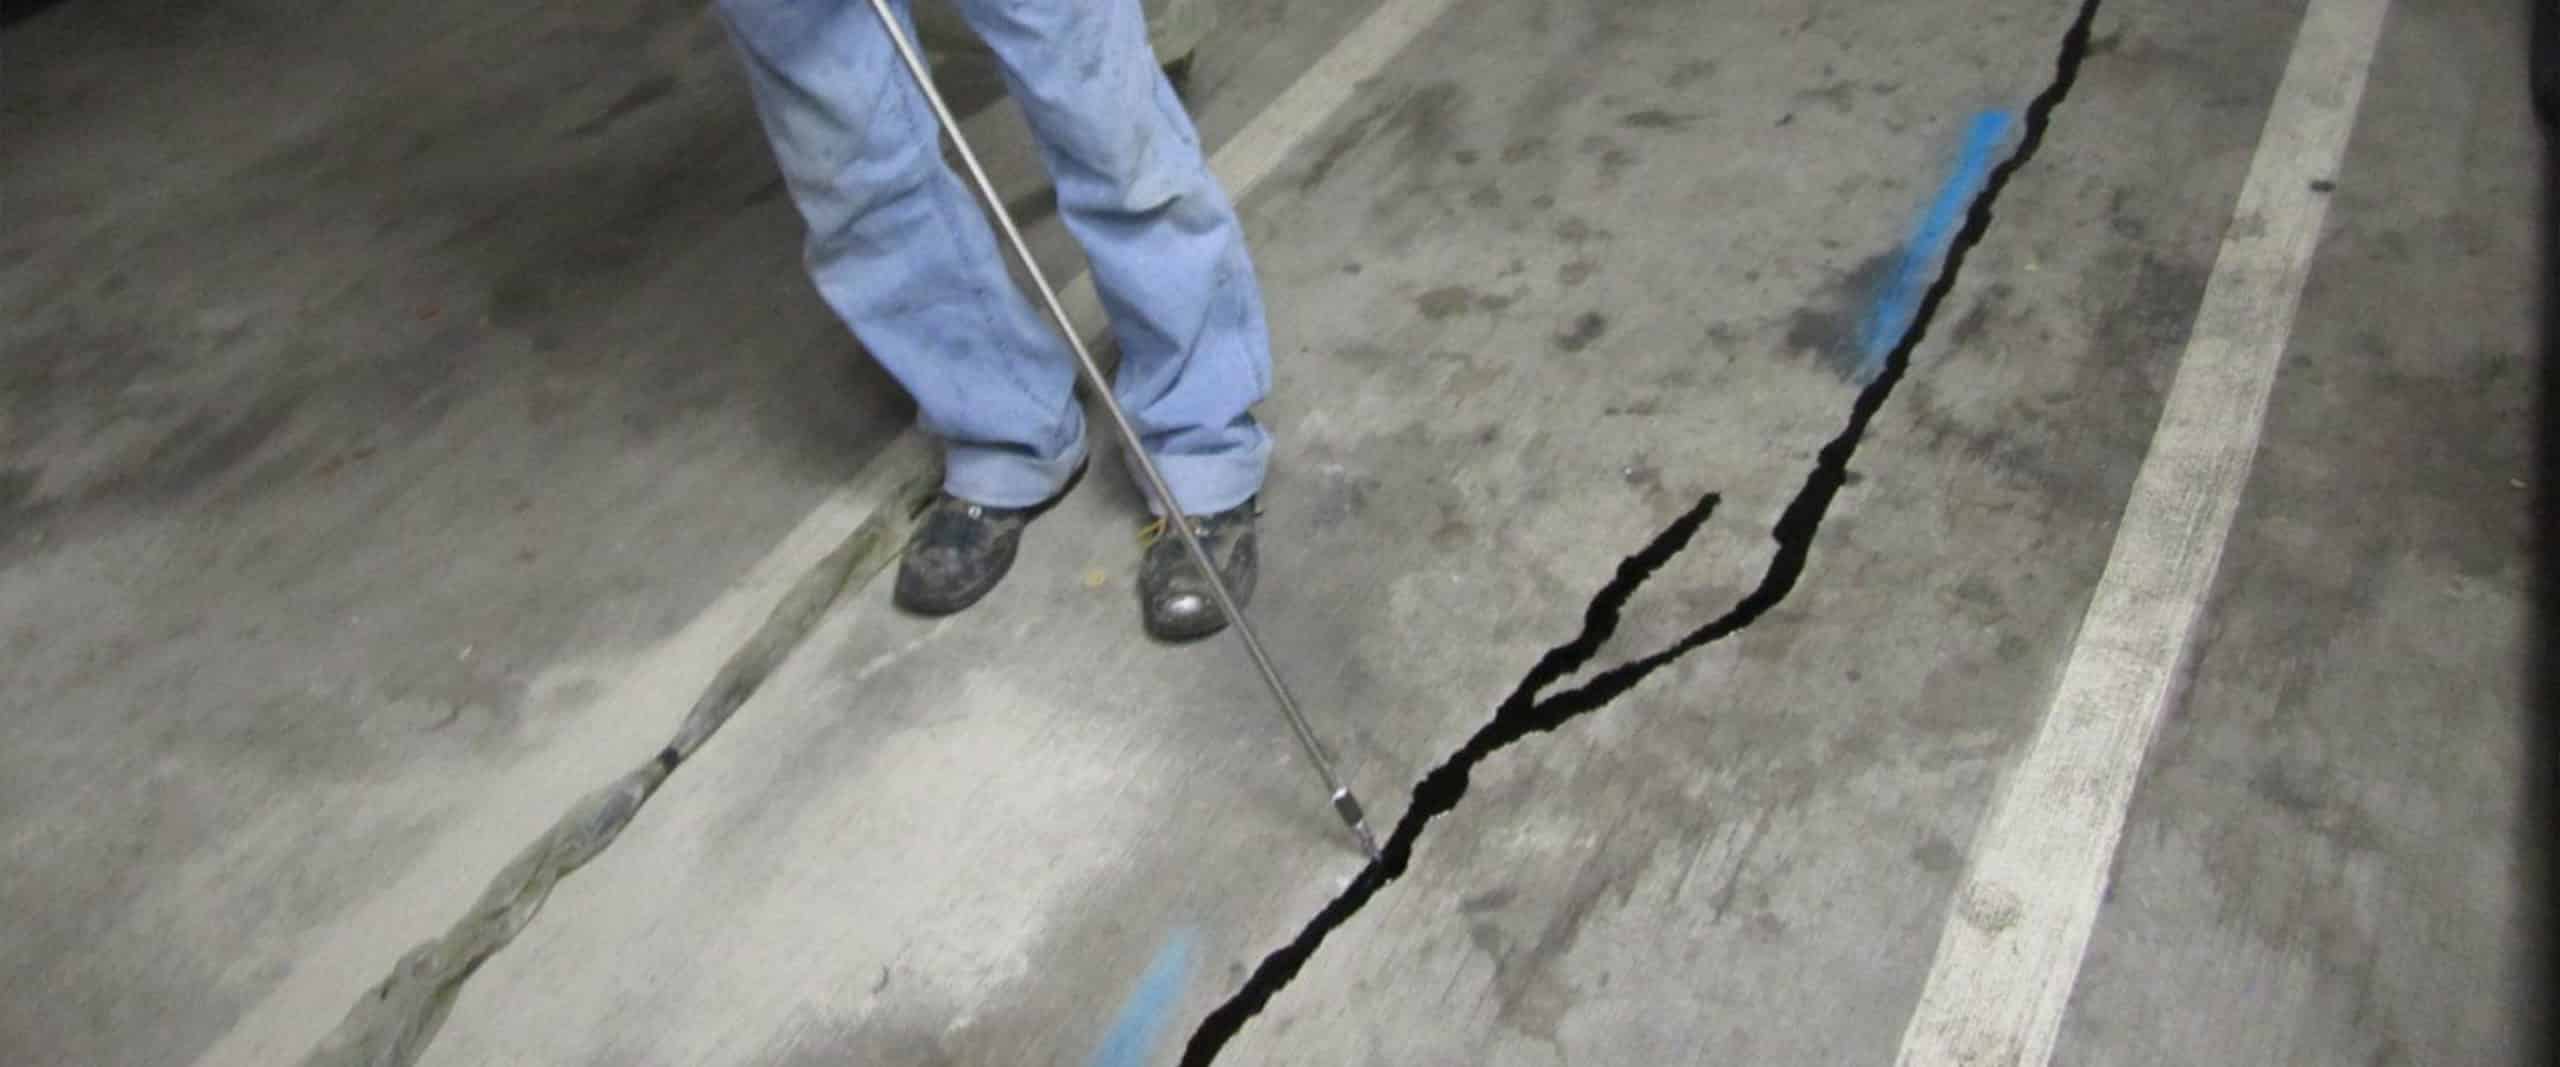
Before addressing any void, the first step is to locate and map out the hollow areas beneath the baseplate. A common and effective technique is “sounding,” which involves tapping the baseplate and listening for changes in sound. A solid baseplate will produce a sharp, high-pitched sound, while hollow areas give off a dull, lower-pitched tone.
Once identified, mark the void boundaries clearly using chalk or a marker. This step ensures accuracy in the subsequent steps and helps prevent unnecessary drilling or filling. Thorough identification minimizes wasted materials and ensures the structural repair is targeted and efficient.
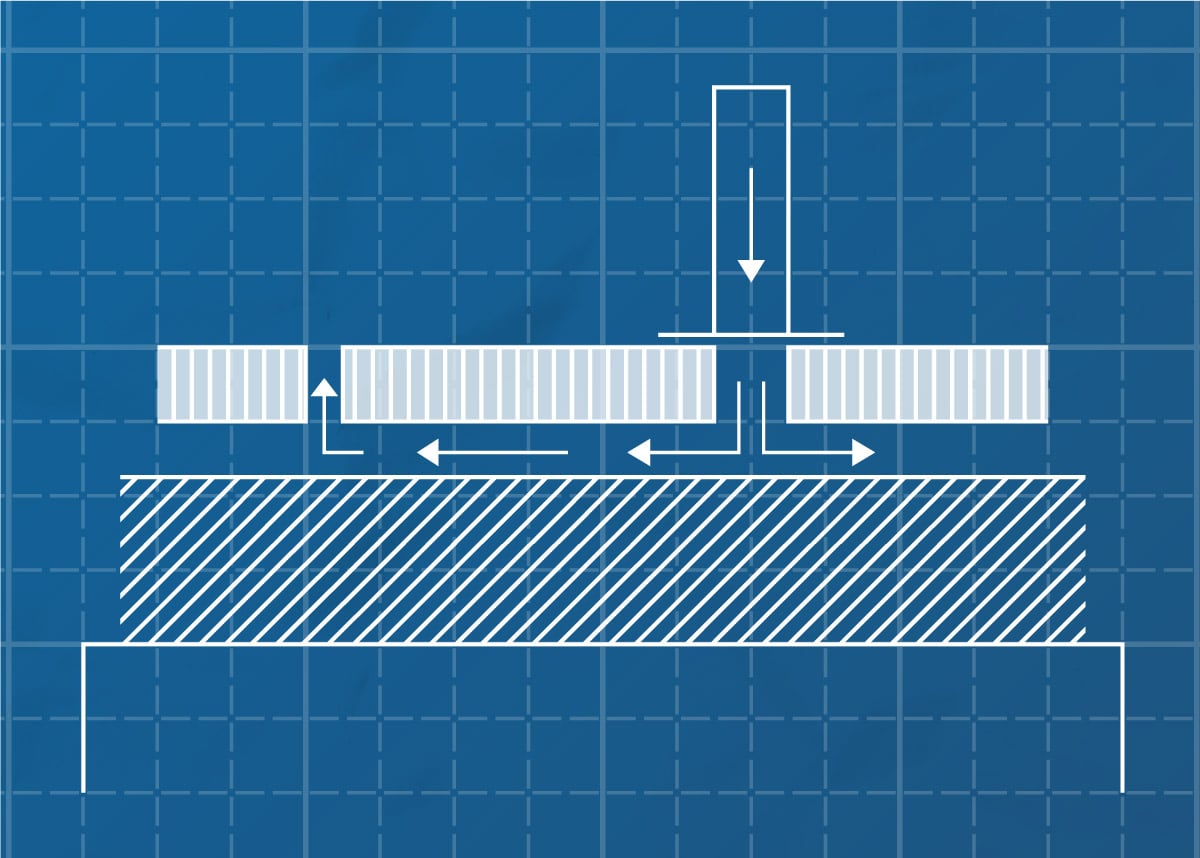
Step 2: Determine Injection Holes
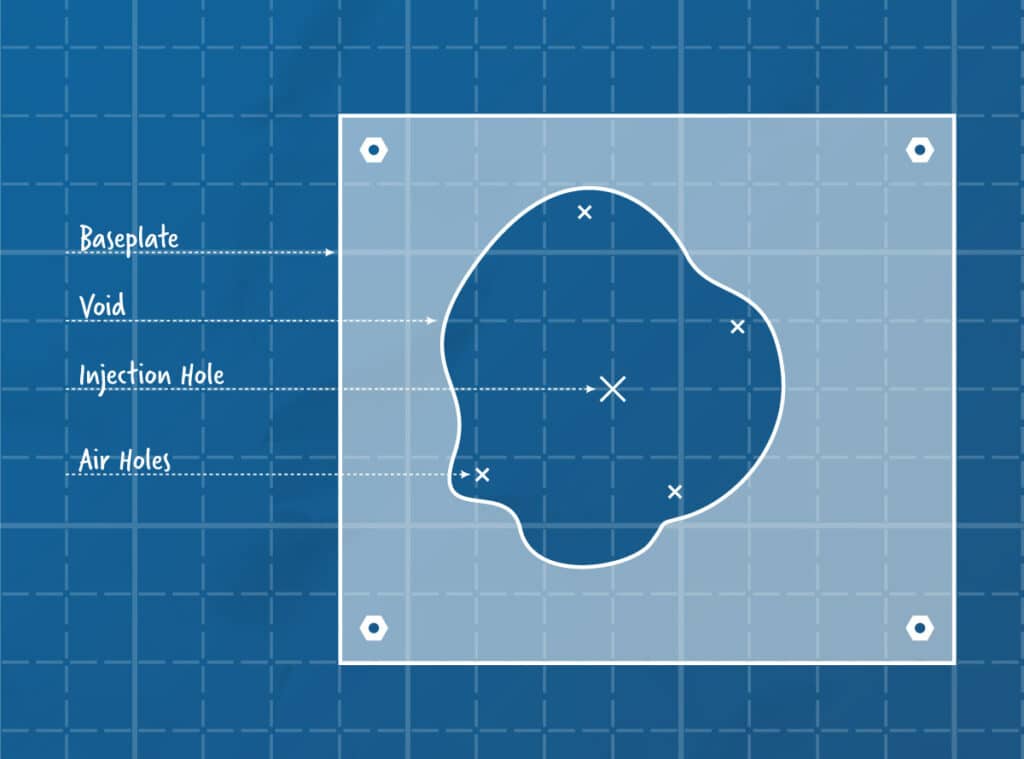
With the void location established, the next step is to determine where to drill injection holes. Injection points should be positioned strategically, ideally near the center of each void. For larger voids, you may need multiple injection points to ensure even material distribution.
Consider the size and shape of the void: tighter voids require injection points closer together to ensure complete filling, while larger voids allow for more spacing. Proper planning at this stage minimizes material waste and ensures a comprehensive fill. Once the points are identified, use a drill to create clean, precise holes that are slightly larger than the diameter of the injection apparatus.
Step 3: Locate Holes for Air Relief
Air relief holes are critical for allowing trapped air to escape as the void is filled. Without proper ventilation, air pockets can prevent the filling material from reaching all areas, compromising the repair.
Drill relief holes at the edges of the void, ensuring their combined area is larger than that of the injection holes. This design allows air to escape freely, creating an even flow of material throughout the void. Mark these holes distinctly to avoid confusion during the filling process.
Step 4: Prepare Holes for Injection
Preparation is key to a successful void-filling process. Depending on the material and equipment being used, there are several preparation methods:
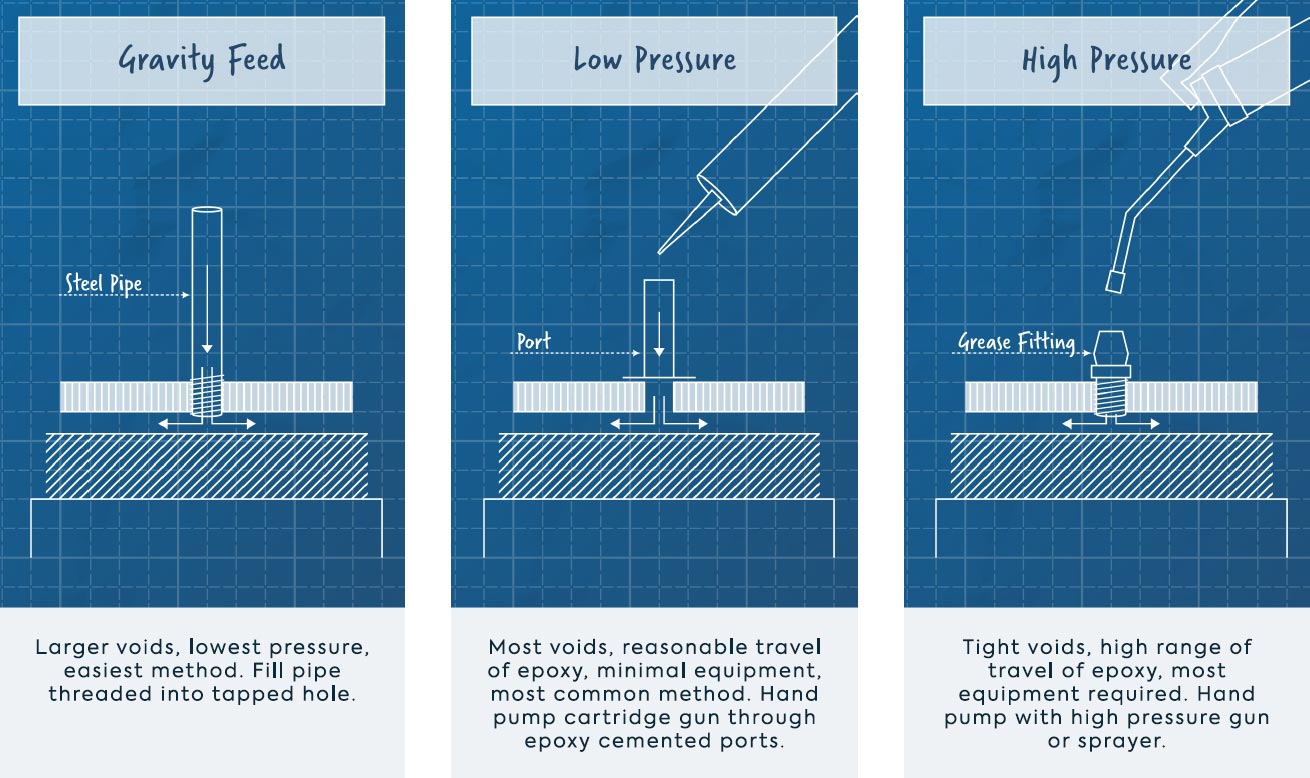
- Attach Injection Ports: If using a surface port system, securely fasten the ports to the drilled holes with adhesive. Ensure they are aligned and sealed properly to prevent leaks during injection.
- Tap the Holes: For a threaded injection system, tap the holes to create threads that fit the pipes or fittings snugly. This step ensures a tight connection, reducing the risk of leakage.
- Insert Pipes or Fittings: For direct injection systems, insert pipes or fittings into the drilled holes. Secure them in place to maintain alignment during the injection process.
Proper preparation reduces material waste and ensures a smooth, uninterrupted flow of the filling material.
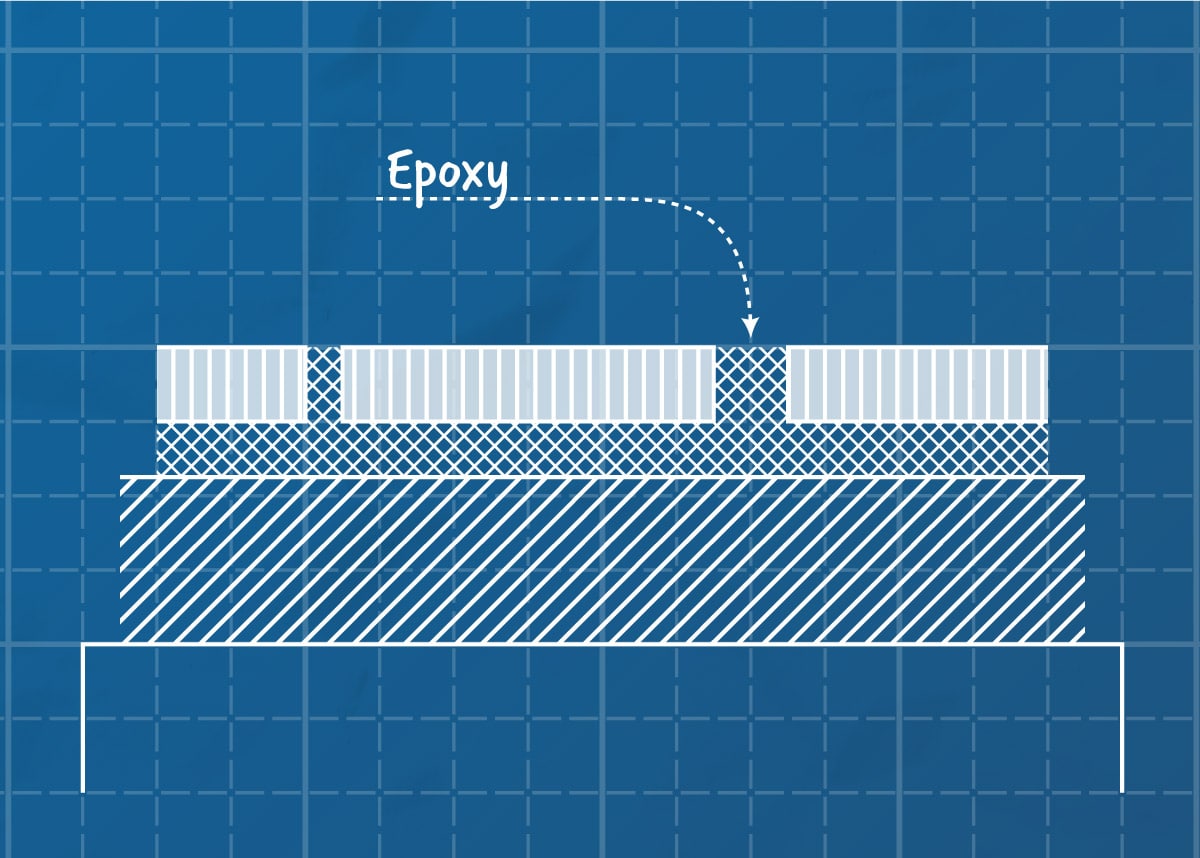
Step 5: Fill Void Area
The actual filling process is where the magic happens. Using the chosen filling material—commonly epoxy or a specialized grout—inject the material through the prepared injection points. A slow and steady approach works best, as it allows the material to flow evenly and fill all void spaces thoroughly.
Monitor the process carefully. The material should flow until it emerges from the air relief holes, indicating the void is completely filled and all air has been displaced. If you’re using a two-part epoxy, ensure the components are mixed properly to avoid curing issues. For larger voids, consider using a pump system for consistent application.
Step 6: Remove Ports & Protect
Once the baseplate void is filled, it’s time to clean up. Remove the injection ports, pipes, or fittings. Stand pipes or fittings can be unscrewed immediately, while adhesive-based surface ports should remain in place until the material cures fully. Follow the manufacturer’s guidelines for curing times.
After removing the apparatus, clean the surface to remove any excess material. If required, apply a protective coating or sealant to safeguard the area from environmental factors such as moisture or chemical exposure. This final step enhances the durability and longevity of the repair.
By following these steps, you can ensure that a baseplate void is addressed effectively and efficiently. Proper void filling not only improves load transfer but also extends the life of your equipment, reducing the risk of costly repairs down the line. Don’t hesitate to give us a call if you need materials or guidance on any of your projects.
Don’t forget to check out our line sheet to see all we have to offer!
